
If Halloween had a signature dessert, the spider web cake would win hands down. It’s spooky, stylish, and surprisingly simple to pull off. Whether you’re baking for a haunted house party, a themed birthday, or just looking to impress your friends on Instagram, this cake is sure to steal the show.
The best part? You don’t need to be a professional baker to make one that turns heads. This guide will walk you through everything — from ingredients and tools to piping tips and chilling tricks. Along the way, we’ll tackle common mistakes, offer fun decorating ideas, and share expert insights to help your spider web cake come out just right.

Spider Web Cake – A Spooky, Sweet Halloween Treat
- Total Time: 1 hour
- Yield: 12 servings
- Diet: Vegetarian
Description
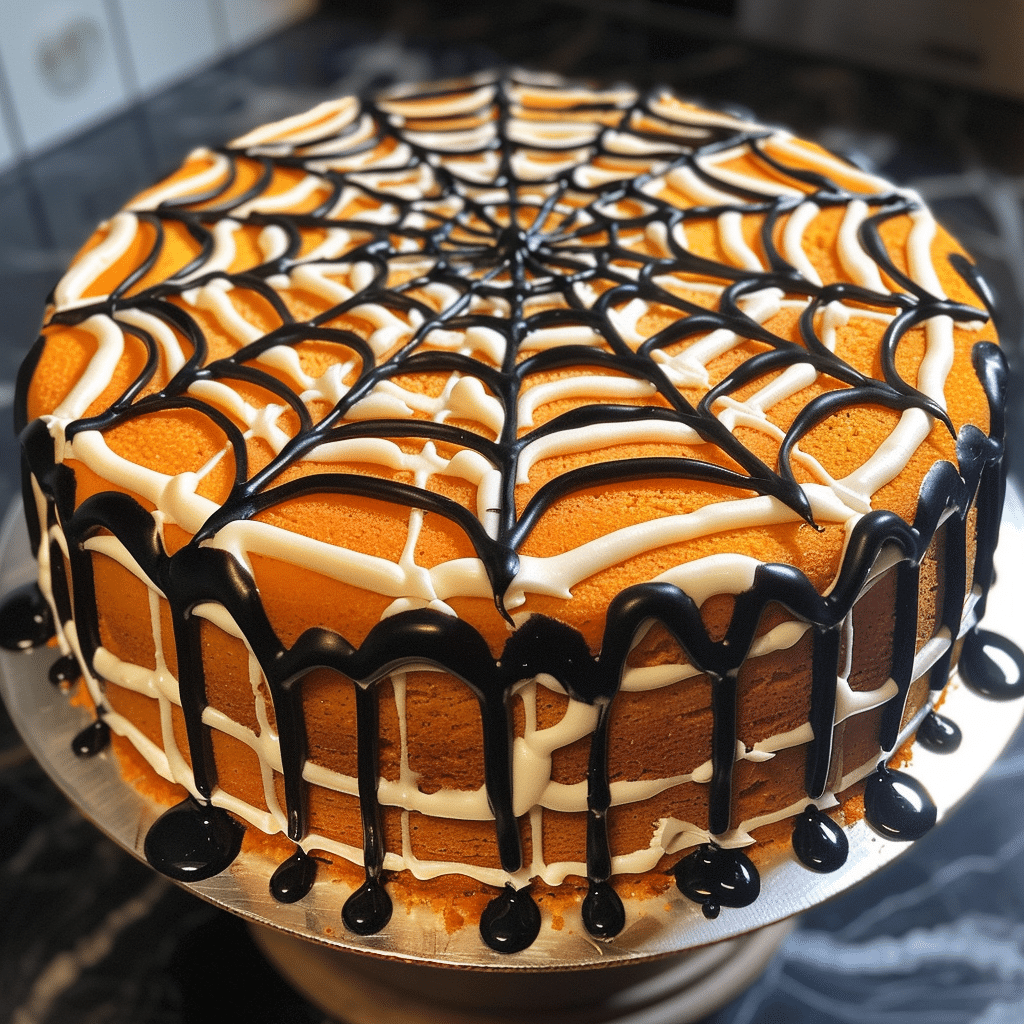
A spooky and festive cake decorated with a spider web design, perfect for Halloween parties. Moist chocolate cake layers are topped with a rich frosting and a striking web pattern.
Ingredients
- 1 3/4 cups all-purpose flour
- 3/4 cup unsweetened cocoa powder
- 2 cups granulated sugar
- 1 1/2 teaspoons baking powder
- 1 1/2 teaspoons baking soda
- 1 teaspoon salt
- 2 large eggs
- 1 cup whole milk
- 1/2 cup vegetable oil
- 2 teaspoons vanilla extract
- 1 cup boiling water
- 2 cups chocolate frosting (store-bought or homemade)
- 1/2 cup white frosting or melted white chocolate (for spider web design)
- Plastic spider decorations (optional)
Instructions
- Preheat oven to 350°F (175°C). Grease and flour two 9-inch round cake pans.
- In a large bowl, whisk together flour, cocoa powder, sugar, baking powder, baking soda, and salt.
- Add eggs, milk, oil, and vanilla to the dry ingredients. Beat until smooth.
- Gradually stir in boiling water (batter will be thin).
- Divide batter evenly between prepared pans and bake for 30–35 minutes, or until a toothpick inserted in the center comes out clean.
- Cool cakes in pans for 10 minutes, then transfer to wire racks to cool completely.
- Spread chocolate frosting evenly over the cooled cake layers and stack them.
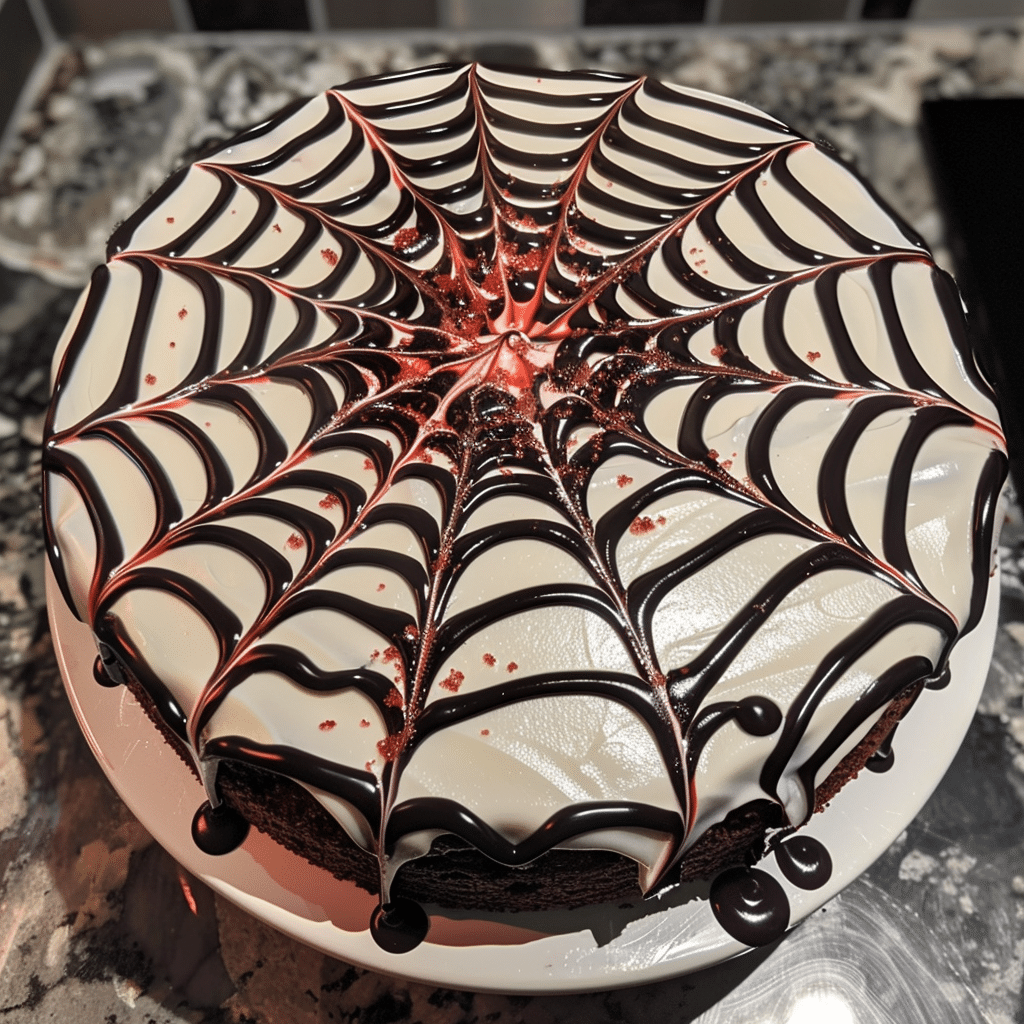
- Fill a piping bag with white frosting or melted white chocolate. Pipe concentric circles on top of the cake.
- Using a toothpick, drag lines from the center outward to create a spider web effect.
- Decorate with plastic spiders for a spooky finishing touch.
Notes
- For extra flavor, add a teaspoon of espresso powder to the cake batter.
- You can make the cake ahead of time and refrigerate it, then decorate on the day of serving.
- Try using orange-tinted frosting for a more festive Halloween look.
- Prep Time: 25 minutes
- Cook Time: 35 minutes
- Category: Dessert, Cake
- Method: Baking
- Cuisine: American
Key Ingredients for a Spider Web Cake
A spider web cake might look like a masterpiece, but the ingredients are super approachable — many of them already live in your pantry. What sets this Halloween cake apart is its bold look and layered flavor.
For the Black Cocoa Cake Layers
To get that deep, dramatic color, you’ll need black cocoa powder. It’s richer and smoother than regular cocoa and gives the cake an intense dark chocolate flavor without using food coloring. Pair it with all-purpose flour, granulated sugar, baking soda, and a splash of vanilla extract for balance. Add buttermilk and hot coffee (or water) to make the cake extra moist.
For the Orange Buttercream Frosting
This is where the Halloween vibe really pops. Use unsalted butter, powdered sugar, a touch of heavy cream, and a drop of orange extract to brighten the flavor. A gel-based orange food color brings it all together without watering down the mix.
For the Spider Web Design
To pipe the web, you’ll need a separate batch of white buttercream or royal icing. Shortening helps the white stay crisp and vibrant, especially when using a fine tip like #2 for detailed webbing.
How to Make a Spider Web Cake – Step by Step
Let’s get into the nitty-gritty of baking your spider web cake. Don’t worry — it’s easier than it looks. With a bit of patience and the right steps, you’ll end up with a spooky showpiece that tastes just as good as it looks.
Bake the Black Cocoa Cake Layers
- Preheat your oven to 350°F (175°C). Grease and line three 6-inch or two 8-inch round pans.
- In one bowl, whisk together flour, black cocoa powder, baking soda, baking powder, salt, and sugar.
- In another bowl, combine buttermilk, eggs, oil, vanilla, and hot coffee (or water).
- Mix wet into dry until you get a thin, smooth batter.
- Pour evenly into pans and bake for 30–35 minutes. Cool completely before frosting.
Make the Orange Buttercream
Whip butter until fluffy, then add powdered sugar, orange extract, and a little cream. Add orange gel color and beat until smooth.
Assemble the Cake
Stack and fill with frosting, then crumb coat and chill. Add a final smooth layer of orange buttercream.
Pipe the Web
Using a fine tip, draw your spider web with white icing — and voilà, your eerie masterpiece is done!
Essential Tools for Making a Spider Web Cake
You don’t need a bakery’s kitchen to create an eye-catching spider web cake, but the right tools make all the difference between “meh” and “wow.” With just a few baking basics and some handy piping tools, you’re good to go.
Must-Have Cake Tools
- Round Cake Pans (6-inch or 8-inch) – For those neat, stackable layers
- Offset Spatula – Smooths out that spooky buttercream like a pro
- Cooling Rack – Helps your cake cool evenly (and faster!)
- Piping Bags and Tips – Use a small round tip like #2 for that classic spider web look
- Mixing Bowls & Electric Mixer – For whipping up dreamy, fluffy buttercream
Helpful Extras
- Cake Turntable – Makes frosting and decorating easier (and way more fun)
- Bench Scraper – For getting those super smooth buttercream sides
- Gel Food Coloring Kit – Especially orange and black
- Toothpicks or Skewers – Perfect for sketching out your web before piping
Creative Variations for Your Spider Web Cake
If there’s one thing better than a perfectly spooky spider web cake, it’s getting to make it your own. With just a few tweaks, you can turn the basic design into a themed masterpiece for any occasion — not just Halloween.
Halloween-Inspired Decoration Ideas
Want to crank up the creep factor? Add these simple touches:
- Candy Spiders & Edible Eyes: Pop a few plastic-free edible spiders or sugar eyes right on the web.
- Black Sprinkles & Purple Dust: Sprinkle around the base or edges for a magical, haunted shimmer.
- Chocolate Ganache Drips: Add dramatic drips for a gothic, gooey twist.
- Web Topper: Create a 3D web using melted chocolate or fondant for extra flair.
Not Just for Halloween: Alternative Themes
Yep, spider web cakes aren’t just stuck in October:
- Spider-Man Birthday Cake: Use red and blue frosting, and pipe a comic-style web — perfect for superhero fans.
- Goth Wedding Cake: Think black-on-black webs, metallic accents, and dark florals for an elegant, moody look.
- Mystical Forest Cake: Pair green buttercream with fine white webs and mushroom toppers for a woodland fantasy vibe.
Flavor Swaps and Fun Combos
Switching up flavors adds a new dimension:
- Red Velvet Layers with cream cheese frosting and dark chocolate web
- Pumpkin Spice Cake with cinnamon-orange buttercream (hello, autumn!)
- Lemon-Poppy Seed Base with lavender-white web design for something unexpectedly whimsical
FAQs About Spider Web Cake
Got questions about your spider web cake? You’re not alone! Whether you’re baking for the first time or planning a Halloween party masterpiece, here are the answers to the most common questions people ask.
How do you make a spider web cake topper?
You can create a simple topper using melted white chocolate or candy melts. Pipe the web shape onto parchment paper, let it cool, and carefully peel it off. Place it gently on top of the cake for a striking 3D effect. Want something reusable? Use a lightweight plastic topper from craft stores.
What icing is best for spider web piping?
Royal icing is your best friend if you’re aiming for sharp, clean lines that dry quickly. It’s great for precision and won’t melt if the cake gets warm. That said, white buttercream works too — just chill the cake first so the lines stay crisp.
Can I make the spider web cake without food coloring?
Yes, but the vibe will change slightly. Use black cocoa powder to achieve a naturally dark cake layer. For the frosting, leave it white or lightly tint with natural alternatives like beetroot powder or activated charcoal. It won’t be bright orange, but still totally spooky!
How far in advance can I make a spider web cake?
You can bake the cake layers up to 3 days ahead, wrapped tightly in plastic and stored in the fridge. Frost and decorate the day before serving for the freshest look. If you’re using royal icing for the web, allow extra time for it to dry completely.
Hungry for more? Visit our website for full recipes and follow us on Pinterest for daily foodie inspo you’ll love to pin!