
Introduction
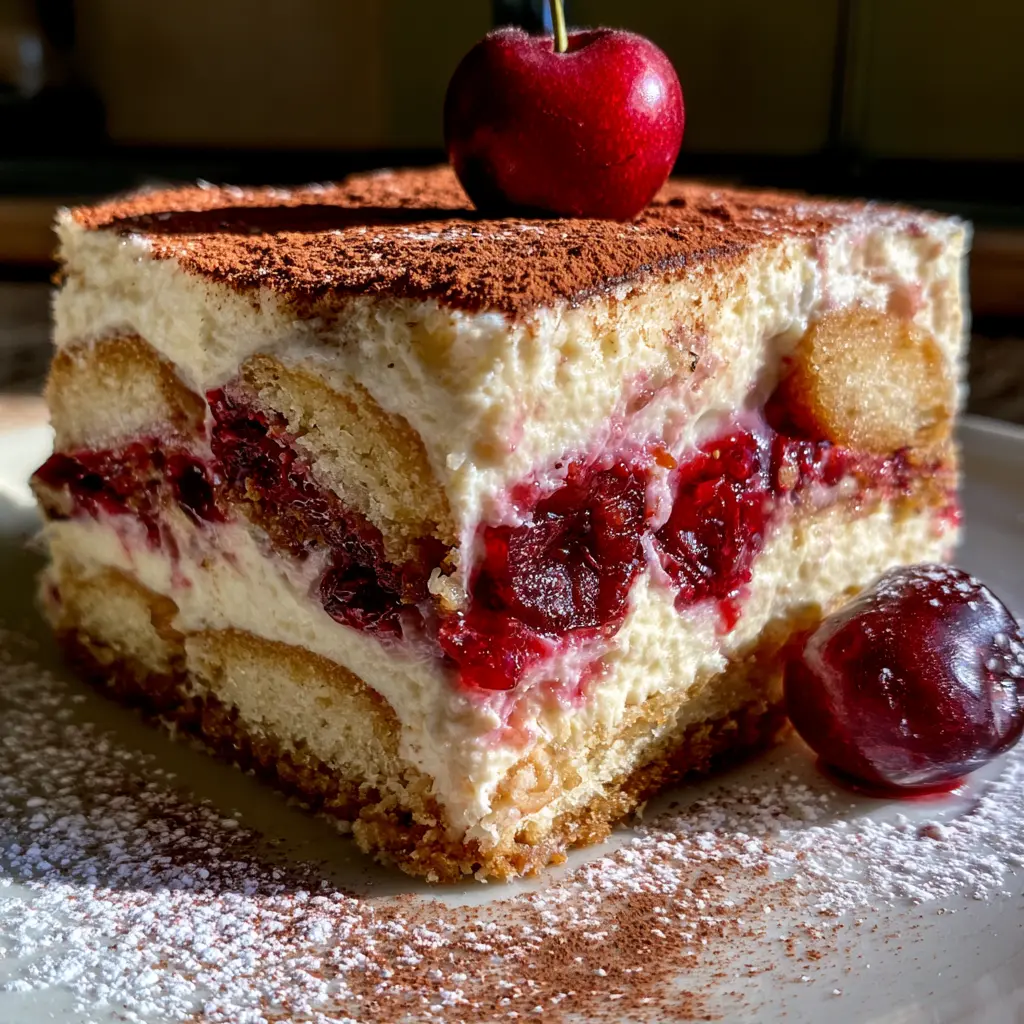
If you love the rich creaminess of cheesecake and the delicate layers of classic tiramisu, this Cherry Cheesecake Tiramisu is the perfect dessert to try. It combines velvety cheesecake filling, soft ladyfingers, and sweet cherry topping into one irresistible no-bake treat. Every bite is smooth, fruity, and perfectly balanced, making it ideal for holidays, family gatherings, or whenever you’re craving something special. Best of all, it’s easy to prepare ahead of time, allowing the flavors to meld beautifully while chilling in the refrigerator.
Print
Cherry Cheesecake Tiramisu: A Creamy No-Bake Dessert Everyone Will Love
- Total Time: 6 hours 25 minutes
- Yield: 12 servings
- Diet: Vegetarian
Description
Cherry Cheesecake Tiramisu is a decadent no-bake layered dessert that combines the creamy richness of cheesecake with the soft layers of classic tiramisu and sweet cherry pie filling. Finished with whipped cream, fresh cherries, and white chocolate shavings, it’s an elegant make-ahead dessert perfect for holidays or summer gatherings.
Ingredients
- For the Cheesecake Filling:
- 16 oz (450 g) cream cheese, softened
- 8 oz (225 g) mascarpone cheese, softened
- 3/4 cup powdered sugar
- 1 teaspoon vanilla extract
- 1 1/2 cups heavy whipping cream, whipped to stiff peaks
- For the Cherry Layer:
- 1 can (21 oz) cherry pie filling
- 1 cup fresh cherries, halved (optional)
- For Assembly:
- 24 ladyfinger cookies
- 1 cup whole milk
- 1 teaspoon vanilla extract
- 1 teaspoon almond extract (optional)
- For Garnish:
- Whipped cream
- Fresh cherries
- White chocolate shavings
- Crushed graham crackers (optional)
- Fresh mint leaves (optional)
Instructions
- Beat the cream cheese until smooth and creamy.
- Add the mascarpone, powdered sugar, and vanilla extract, mixing until fully combined.
- Gently fold the whipped cream into the cheesecake mixture until light and fluffy.
- In a shallow bowl, combine the milk, vanilla extract, and almond extract if using.
- Quickly dip each ladyfinger into the milk mixture without soaking.
- Arrange a layer of dipped ladyfingers in the bottom of a 9×13-inch dish.
- Spread one-third of the cheesecake filling over the ladyfingers.
- Spoon half of the cherry pie filling evenly over the cream layer.
- Repeat with another layer of dipped ladyfingers, cheesecake filling, and remaining cherries.
- Finish with a final layer of dipped ladyfingers and the remaining cheesecake filling.
- Cover and refrigerate for at least 6 hours or overnight until fully set.
- Before serving, garnish with whipped cream, fresh cherries, white chocolate shavings, crushed graham crackers, and mint if desired.
Notes
- Use full-fat cream cheese and mascarpone for the creamiest texture.
- Do not oversoak the ladyfingers to prevent a soggy dessert.
- Fresh cherries add extra texture and freshness but are optional.
- For a richer flavor, chill the tiramisu overnight before serving.
- Store covered in the refrigerator for up to 4 days.
- Prep Time: 25 minutes
- Cook Time: 0 minutes
- Category: Dessert
- Method: No-Bake
- Cuisine: Italian-American
Why You’ll Love This Recipe
- No baking required
- Rich, creamy cheesecake filling
- Sweet and juicy cherry flavor
- Easy to make ahead
- Perfect for parties and holidays
- Beautiful layered presentation
Ingredients
Tip: You can find the complete list of ingredients and their measurements in the recipe card below.
- Ladyfinger cookies
- Cream cheese, softened
- Mascarpone cheese
- Heavy whipping cream
- Powdered sugar
- Vanilla extract
- Cherry pie filling
- Milk
- Almond extract (optional)
- Fresh cherries for garnish
How to Make
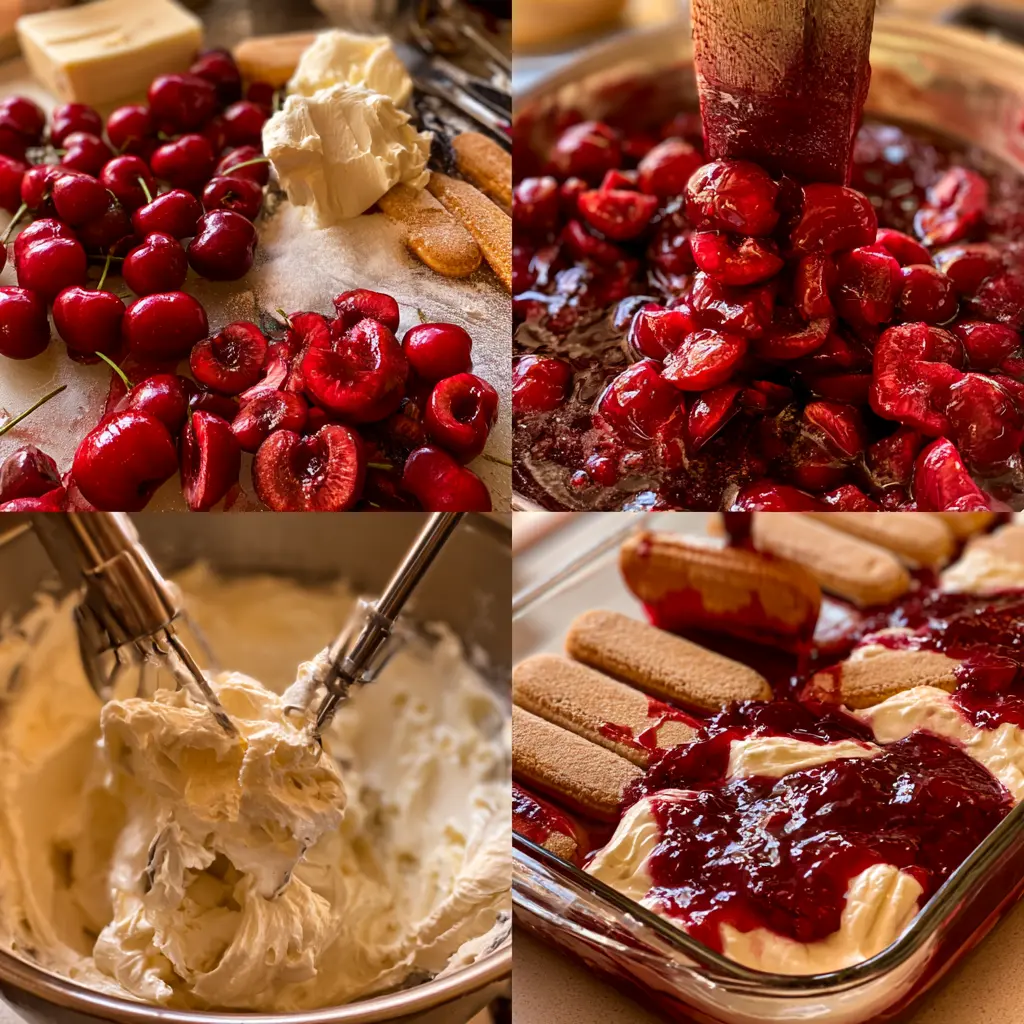
Beat the cream cheese until smooth, then mix in the mascarpone, powdered sugar, vanilla extract, and a small amount of almond extract if using. In a separate bowl, whip the heavy cream until soft peaks form, then gently fold it into the cream cheese mixture until light and fluffy.
Quickly dip each ladyfinger into the milk and arrange them in a single layer in a serving dish. Spread half of the cheesecake filling over the cookies, followed by half of the cherry pie filling. Repeat the layers with the remaining ladyfingers, cheesecake mixture, and cherries. Cover and refrigerate for at least 6 hours or overnight. Garnish with fresh cherries before serving.
Common Mistakes to Avoid
- Soaking the ladyfingers for too long
- Using cold cream cheese without softening it
- Overmixing the whipped cream
- Skipping the chilling time
- Adding too much cherry filling between layers
Equipment Needed
Here’s what you’ll want to have on hand:
Silicone Spatula – Durable, heat-resistant silicone spatula perfect for mixing, scraping, and spreading. Gentle on non-stick cookware and easy to clean.
Large pot – You’ll need this to boil the whole cabbage head and soften the leaves.
large bowl –Spacious, durable large bowl ideal for mixing, serving, or food preparation. Made from sturdy material and easy to clean.
Sharp knife – For coring the cabbage and slicing out the thick stem in each leaf. A paring knife works best.
Mixing bowl – A big bowl makes it easier to combine your meat and rice filling evenly.
Cutting board – For prepping cabbage leaves and rolling them like a pro.
Full-Size Blender – is a powerful kitchen appliance for making smoothies, soups, and sauces in large batches.
3-in-1 Air Fryer – This versatile 3-in-1 air fryer offers Air Fry for healthier meals with less oil, Bake for bakery-quality desserts and treats, and Reheat to bring leftovers back to life with crispy, flavorful results
Servings and Timing
- Servings: 10–12
- Prep Time: 25 minutes
- Chill Time: 6 hours
- Total Time: 6 hours 25 minutes
Storage & Reheating
Store covered in the refrigerator for up to 4 days. This dessert is best served chilled and should not be reheated. It can also be frozen for up to one month and thawed in the refrigerator before serving.
Variations & Customizations
- Use fresh cherry compote instead of pie filling.
- Add dark chocolate shavings between the layers.
- Swap cherries for strawberries or raspberries.
- Use chocolate ladyfingers for a richer dessert.
- Add a splash of cherry liqueur for an adult version.
- Top with whipped cream and grated chocolate before serving.
Nutrition (Per Serving)
| Nutrient | Amount |
|---|---|
| Calories | 420 |
| Protein | 6 g |
| Carbohydrates | 34 g |
| Fat | 29 g |
| Saturated Fat | 17 g |
| Fiber | 1 g |
| Sugar | 24 g |
| Sodium | 190 mg |
Nutrition values are approximate.
Expert Tips
- Use full-fat cream cheese and mascarpone for the creamiest texture.
- Chill overnight for the best flavor.
- Dip the ladyfingers quickly to keep them from becoming soggy.
- Smooth each layer evenly for beautiful slices.
- Garnish with fresh cherries just before serving.
FAQs
Can I make Cherry Cheesecake Tiramisu ahead of time?
Yes, it’s even better after chilling overnight.
Can I use fresh cherries?
Absolutely. Fresh cherry compote or sweetened fresh cherries work wonderfully.
Can I freeze this dessert?
Yes, freeze it for up to one month in an airtight container.
Can I use whipped topping instead of whipped cream?
Yes, although freshly whipped cream provides the best flavor and texture.
How long will it keep?
It stays fresh in the refrigerator for up to 4 days.
Can I make individual servings?
Yes, assemble the layers in small glasses or dessert jars for an elegant presentation.
Conclusion
Cherry Cheesecake Tiramisu is the perfect fusion of two classic desserts, offering creamy cheesecake layers, soft ladyfingers, and sweet cherry goodness in every bite. Easy to prepare and ideal for making ahead, this no-bake dessert is guaranteed to impress your family and guests on any occasion.
Hungry for more? Visit our website for full recipes and follow us on Pinterest for daily foodie inspo you’ll love to pin!